How to Set Up Your Account & Invite Your Team
Get your organisation, locations, and staff set up in under 15 minutes.
| For | Module | Read Time |
|---|---|---|
| Owner & Manager | Account Setup | 5 min |
This article walks you through setting up Restaurant Codex from scratch – from completing your organisation profile to getting your first team member logged in and ready to go.
Restaurant Codex creates your account for you – you don't sign up yourself. If you haven't received your login details yet, chat with us below and we'll get you sorted.
Step 1 – Log In & Complete Your Organisation Details
Restaurant Codex creates your account for you. Once it's ready, you'll receive your login details from the Codex team. Your first job is to log in and fill in your organisation details.
- Go to app.restaurantcodex.com and log in with the credentials sent to you
- You'll be prompted to complete your Organisation Profile
- Enter your Brand / Organisation Name (e.g. "Salt + Lime" or "Tapiz Bistro Group")
- Add your logo and any other brand details
- Click Save Organisation to continue
Use your trading name as the organisation name – this is what your staff will see when they get their invite.
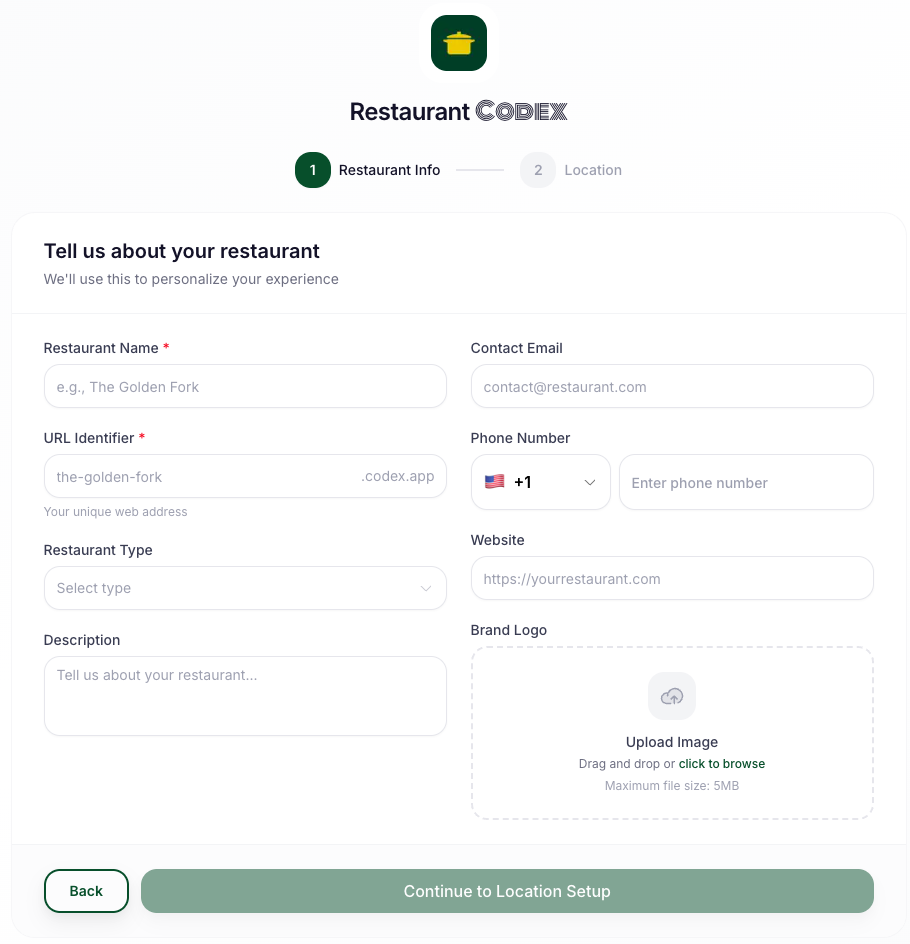
Image A7 — Organisation profile setup
Step 2 – Add Your Location (Site)
Each restaurant or physical location is called a Site. Even if you only have one location, you need to create it here.
- From the dashboard, click Add Site
- Enter your location name (e.g. "Downtown Branch" or "Main Kitchen")
- Add the address and any location-specific details
- Click Save Site
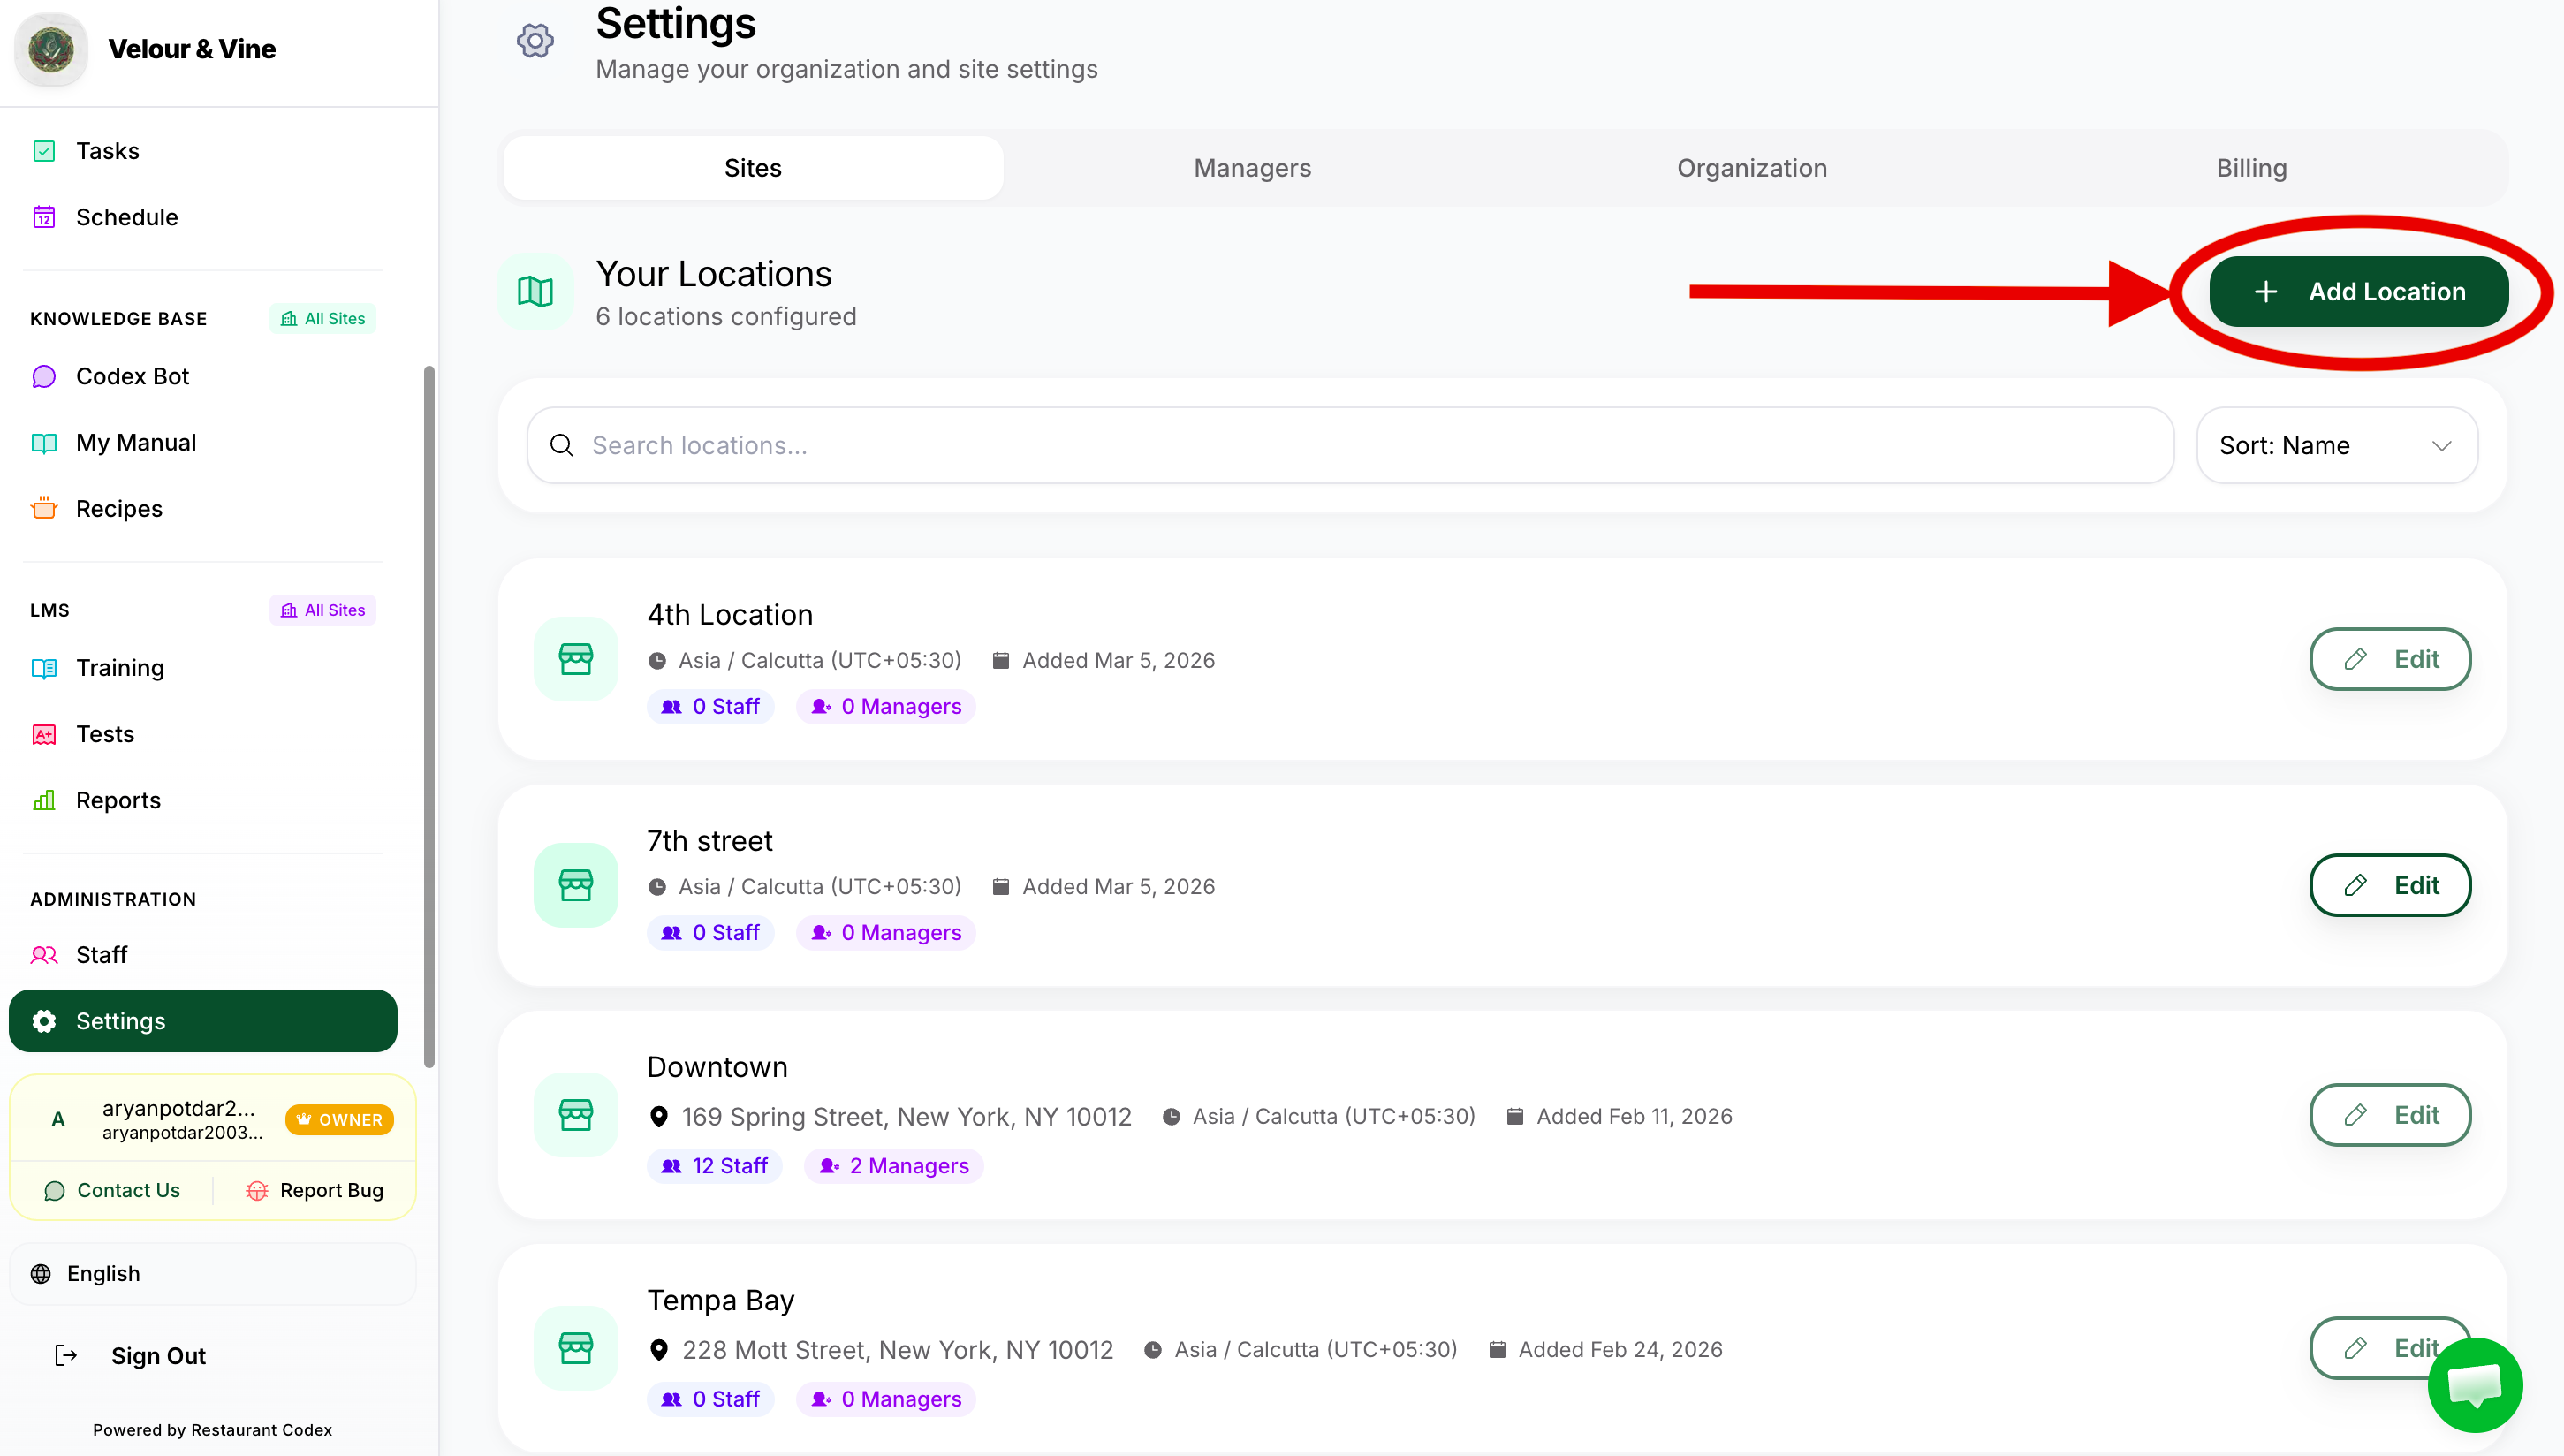
Image A8 — Add site workflow
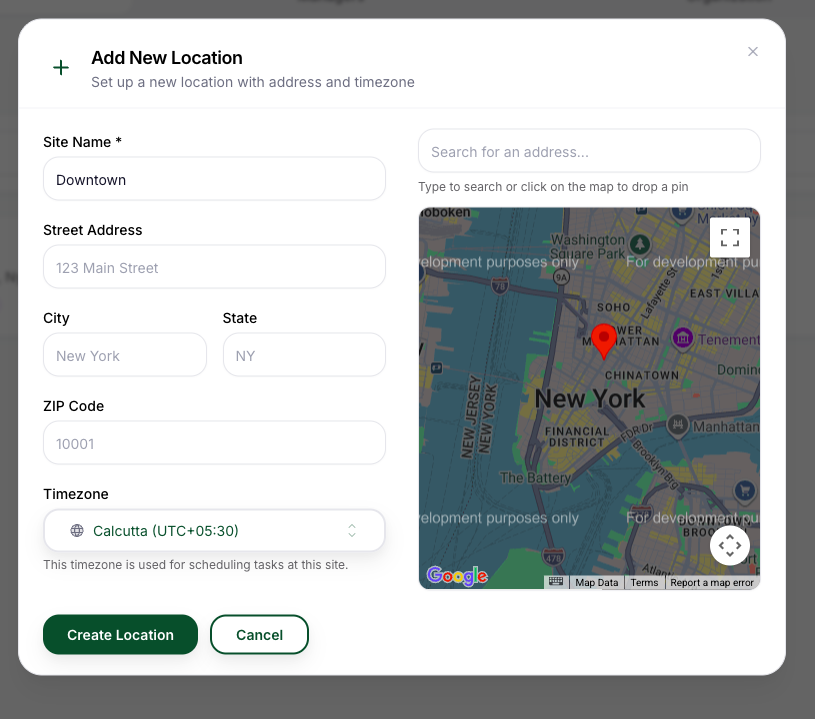
Image A9 — Site details example
If you run more than one location, repeat this step for each site. As an Owner, you'll have full visibility and control across all your sites from one account.
Your Knowledge Base and training content is shared centrally – only day-to-day operations differ per location.
Step 3 – Invite Your Staff by Phone Number
There is one way to invite staff: by phone number. When you send the invite, an SMS is automatically sent with their login link.
- Go to Staff > Invite Team Member
- Enter the staff member's phone number
- Select their Role – this is required before the invite can be sent
- Select the Site they belong to
- Click Send Invite – they'll instantly receive an SMS with their login link
You must select a role before the invite will send. The system won't let you skip it. Not sure which role to assign? See the Roles & Permissions section below.
How It Works: Once the invite is sent, it shows as Pending until the staff member logs in for the first time. As soon as they log in, the invite status changes to Active – that's how you know they're in.
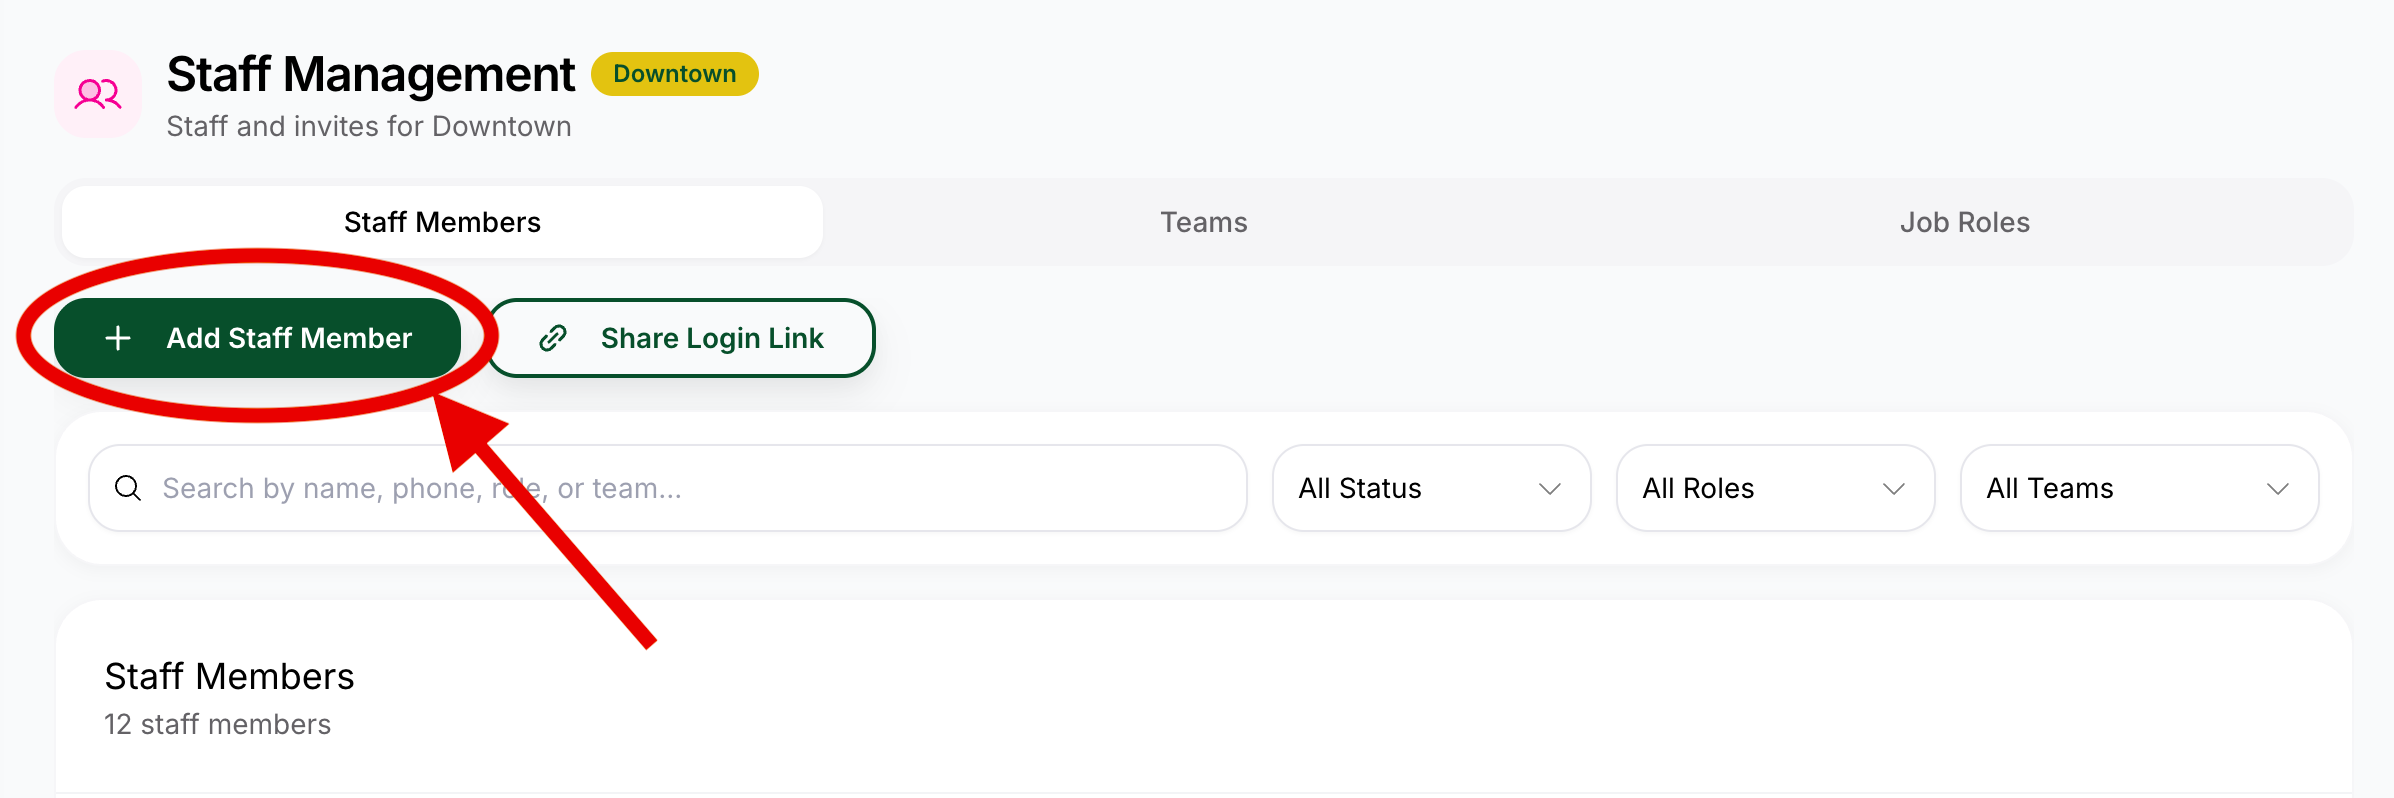
Image A10 — Invite staff by phone number

Image A11 — Invite status pending and active
Step 4 – How to Create & Manage Managers
Managers are the people who run the day-to-day in Codex on your behalf – they assign tasks, manage staff, and keep operations moving. You create and manage them from Settings.
Adding a New Manager
- Go to Settings > Managers > Add Manager
- Enter the Manager's email & details
- Select the Site(s) they will manage
- Set their Permission Level – decide what they can and can't do
- Click Send Invite – they'll receive an SMS with their login link
Editing or Removing a Manager
- Go to Settings > Team & Roles
- Find the Manager and click Edit to update their details, sites, or permissions
- To remove a Manager, click Remove – their access is deactivated immediately
The number of Managers you can add depends on your plan. If you need to add more than your current plan allows, chat with us and we'll sort it out.
Removing a Manager does not delete the staff they invited or the tasks they created. All content and staff remain intact – only the Manager's access is removed.
You're in Control
Every Manager's access is set by you – which sites they see, which actions they can take, whether they can invite staff. You can update or restrict a Manager's permissions at any time from Settings > Managers.
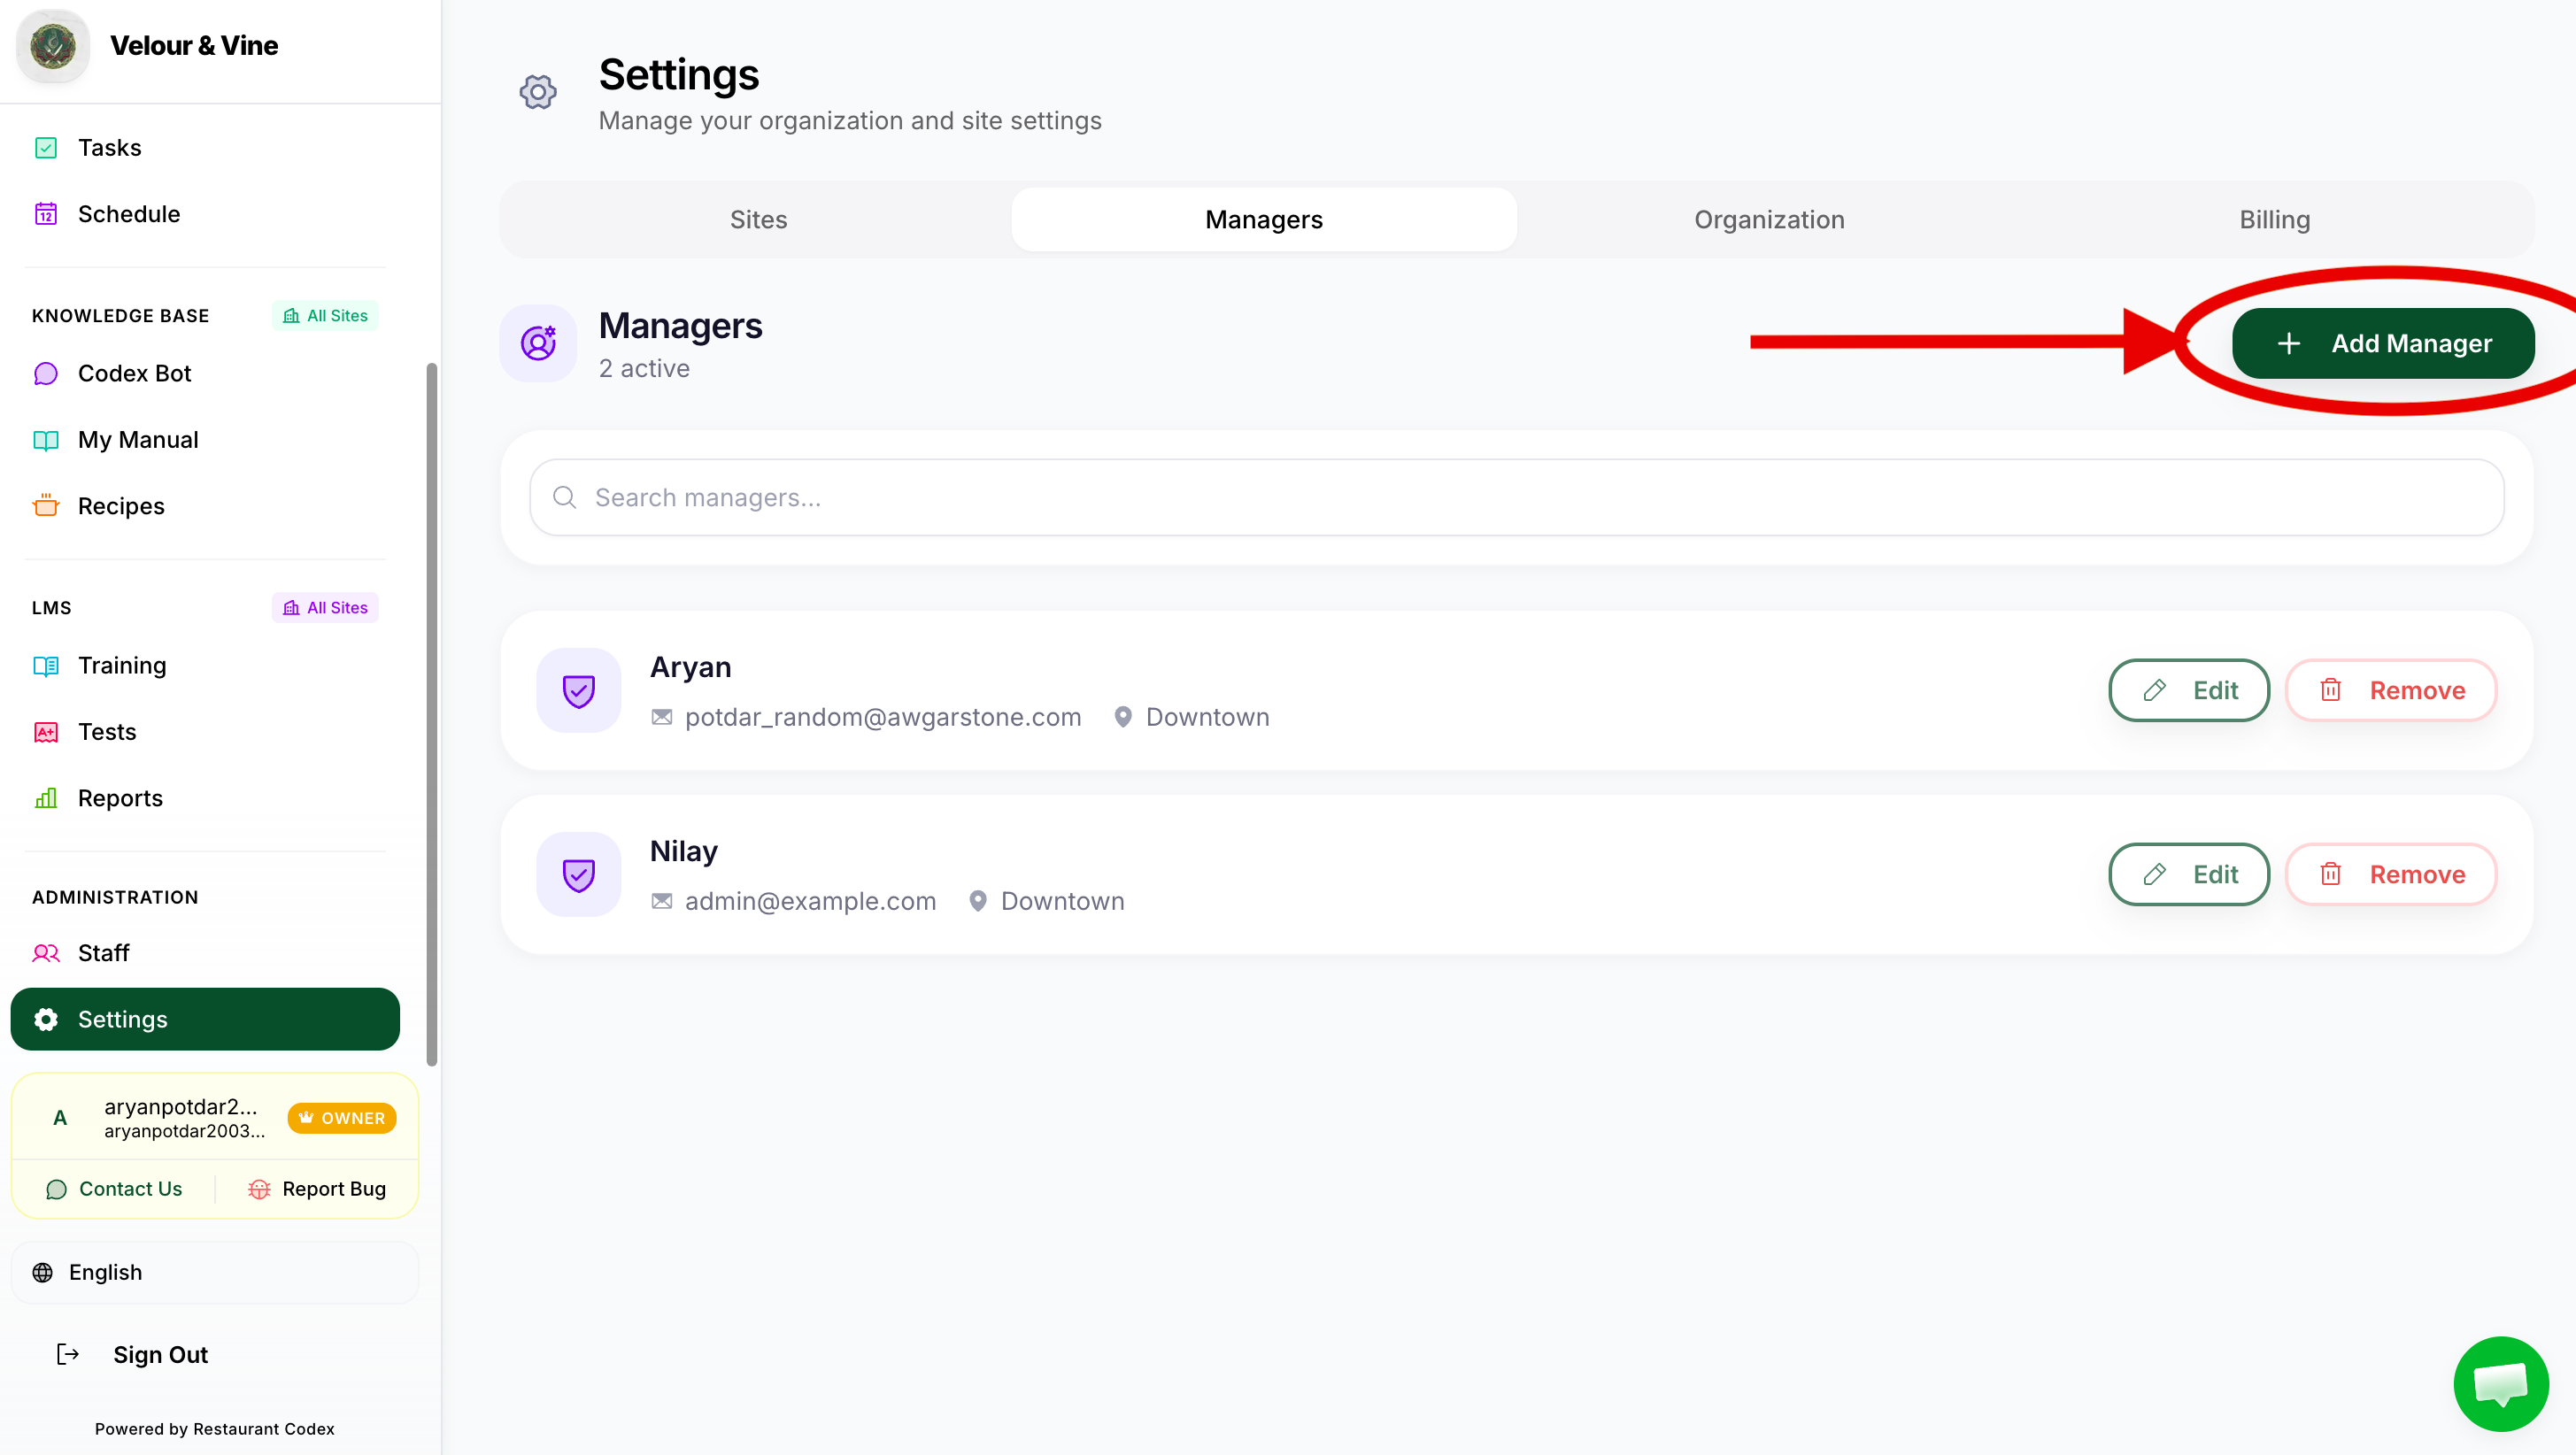
Image A12 — Create manager form
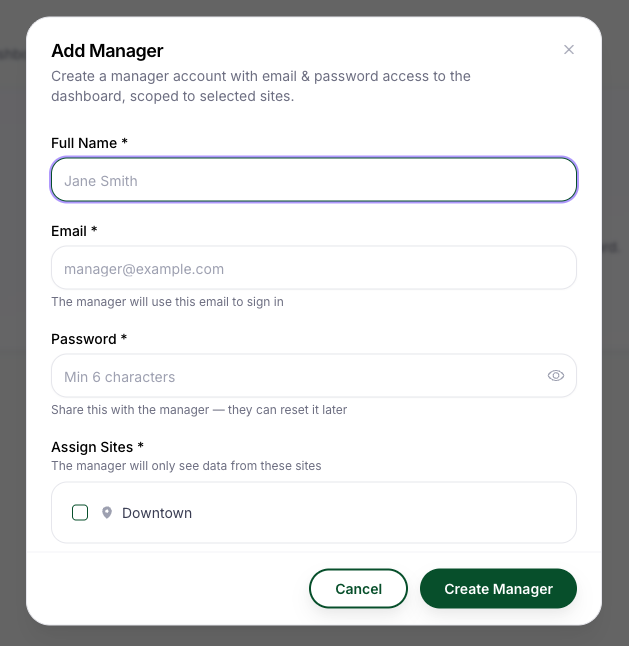
Image A13 — Manager settings and controls
Step 5 – Roles, Permissions & Job Classifications
Understanding who can do what is the foundation of running Codex properly. Here's the full picture.
Full Permissions Table
Three system roles control what each person can see and do across the entire platform.
| Capability | Owner | Manager | Staff |
|---|---|---|---|
| Account & Setup | |||
| Access billing & plan details | ✅ | – | – |
| Create and manage Managers | ✅ | – | – |
| Set Manager permissions | ✅ | – | – |
| Add & manage locations (Sites) | ✅ | – | – |
| View all sites in dashboard | ✅ | – | – |
| Invite Staff members | ✅ | ✅ | – |
| Remove Staff members | ✅ | ✅ | – |
| Operations | |||
| Create tasks & checklists | ✅ | ✅ | – |
| Assign tasks to staff | ✅ | ✅ | – |
| Set recurring schedules | ✅ | ✅ | – |
| Complete assigned tasks | ✅ | ✅ | ✅ |
| Submit photo proof of completion | ✅ | ✅ | ✅ |
| View Live Ops Feed | ✅ | ✅ | – |
| View own task list & planner | ✅ | ✅ | ✅ |
| View analytics & completion reports | ✅ | ✅ | – |
| Knowledge Base | |||
| Add recipes & SOPs | ✅ | ✅ | – |
| Edit & update KB content | ✅ | ✅ | – |
| Upload documents & PDFs | ✅ | ✅ | – |
| Use Codex Bot to ask questions | ✅ | ✅ | ✅ |
| Access centralised KB (all sites) | ✅ | ✅ | – |
| LMS | |||
| Create training courses & quizzes | ✅ | ✅ | – |
| Assign training to staff | ✅ | ✅ | – |
| Complete assigned courses & quizzes | ✅ | ✅ | ✅ |
| View team training progress | ✅ | ✅ | – |
| Access AI training reports | ✅ | ✅ | – |
| View own training progress | ✅ | ✅ | ✅ |
| Issue certifications | ✅ | ✅ | – |
Role Summary
| Role | Who It's For | What They Do in Codex |
|---|---|---|
| Owner | Restaurant Owner, Operator, Franchisee, Director of Operations | Full platform control – settings, billing, all sites, all reports |
| Manager | Restaurant Manager, General Manager, Head Chef, Floor Manager, Shift Supervisor, Sous Chef | Creates tasks, manages staff, builds KB & training, runs reports for their site(s) |
| Staff | Server, Barista, Line Cook, Prep Cook, Bartender, Cashier, Host, Delivery Staff, and more | Completes assigned tasks, submits photo proof, uses Codex Bot, completes training – sees only their own view and schedule |
A Barista and a Dishwasher both get the Staff role – they just receive different tasks and training. You don't need to create separate system roles per job title. The three system roles handle everything.
By default, Managers can do everything marked for their role. As the Owner, you can restrict specific capabilities per Manager from Settings > Team & Roles.
Step 6 – Organise Into Teams (Optional but Recommended)
Teams let you group staff by department, shift, or station. This makes it faster to assign tasks and training to the right people.
- Go to Staff > Teams > Create New Team
- Name the team (e.g. "Kitchen Team")
- Add the relevant staff members
- You can now assign tasks and courses to the whole team in one click
Example team names: Front of House, Back of House, Bar, Management, Cleaning Crew.

Image A14 — Team creation view
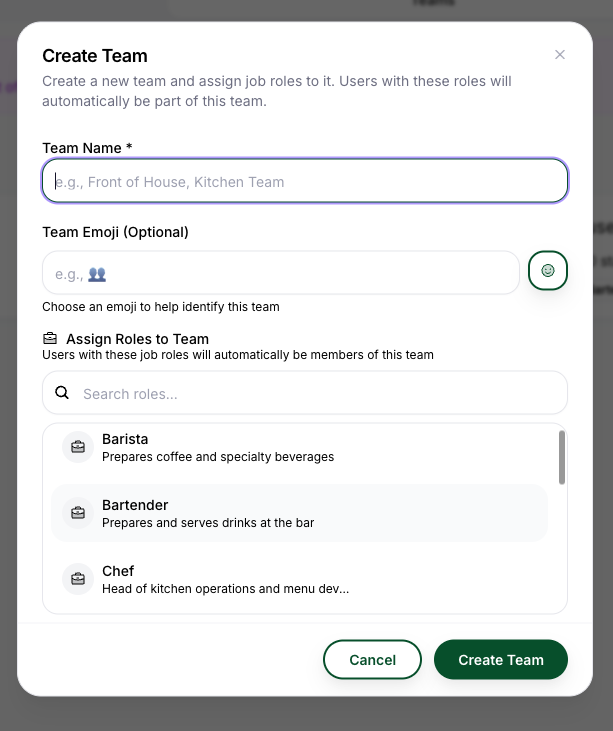
Image A15 — Team assignment example
Recommended Devices for Each Role
Codex works on any device with a browser. Each role has a natural home device – using the right one makes the experience significantly better.
| Role | Best Used On | Why |
|---|---|---|
| Owner | Desktop or Laptop | Full dashboard, analytics, reports, and settings are all best on a larger screen |
| Manager | Desktop / Laptop, Tablet on the floor | Desktop for creating tasks & managing the KB. Tablet ideal for on-floor management during a live shift |
| Staff | Smartphone or Tablet | Staff complete tasks, submit photos, and use Codex Bot on the go – built for the floor |
The platform automatically adjusts its layout for phone, tablet, and desktop. For the best experience: Owners and Managers on desktop or tablet, Staff on their phone.
Multi-Site Setup
If you run more than one restaurant, your Owner account gives you full visibility and control across all of them.
- Each site has its own staff, tasks, checklists, and schedules
- Your Knowledge Base – recipes, SOPs, and the Codex Bot – is centralised and shared across all sites
- Your LMS training courses and content are also shared across all sites
- Managers can be assigned to one site or multiple, depending on their role
- Staff only ever see their own site – they have no visibility into other locations
What This Means in Practice:
- Update a recipe once in the Knowledge Base – every location gets it instantly
- Create a training course once – assign it to staff across all your sites
- Each site runs its own day-to-day operations independently
Image A16 — Module scope by site
Site-dependent
- Dashboard analytics
- Operations tasks and feed
- Staff activity results
- LMS reports by site
Centralized (shared)
- Knowledge Base content
- Recipes and SOPs
- Codex Bot source answers
- LMS course content
Rule of thumb: Build once globally (SOPs, recipes, courses). Execute per site (tasks, completions, analytics, performance).
Next Steps
- Installing Codex & Logging In → (share this with your staff)
Chat with us using the support button or email support@restaurantcodex.com. Learn about access management and roles.